Quick Recipe Version (TL;DR)
Quick Ingredients
- 2 tbsp vegetable or canola oil
- 1 large yellow onion, diced
- 1 red bell pepper, diced
- 1 jalapeño, seeded and minced (optional for heat)
- 4 cloves garlic, minced
- 2 lb (900 g) ground beef (80/20)
- 3 tbsp tomato paste
- 2 tbsp chili powder
- 2 tsp smoked paprika
- 2 tsp ground cumin
- 1 tsp dried oregano
- 1 tsp ground coriander
- 1 tsp chipotle chili powder or 1–2 tbsp minced chipotle in adobo
- 1 tsp unsweetened cocoa powder
- 2 tsp kosher salt, plus more to taste
- 1/2 tsp freshly ground black pepper
- 1 tbsp brown sugar
- 1 cup low-sodium beef broth
- 1 cup lager beer (or more broth)
- 1 (28 oz) can fire-roasted diced tomatoes
- 1 (15 oz) can tomato sauce
- 1 (15 oz) can kidney beans, drained and rinsed
- 1 (15 oz) can black beans, drained and rinsed
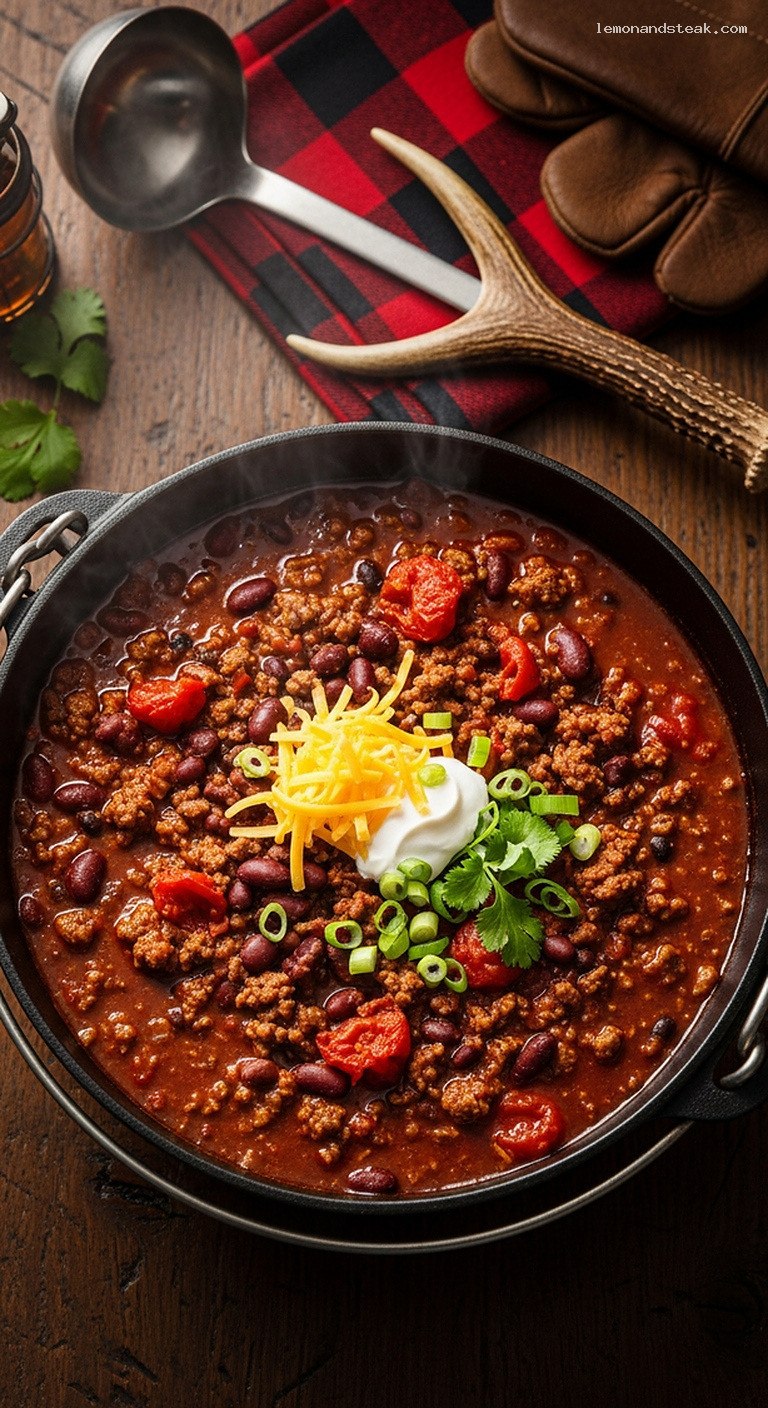
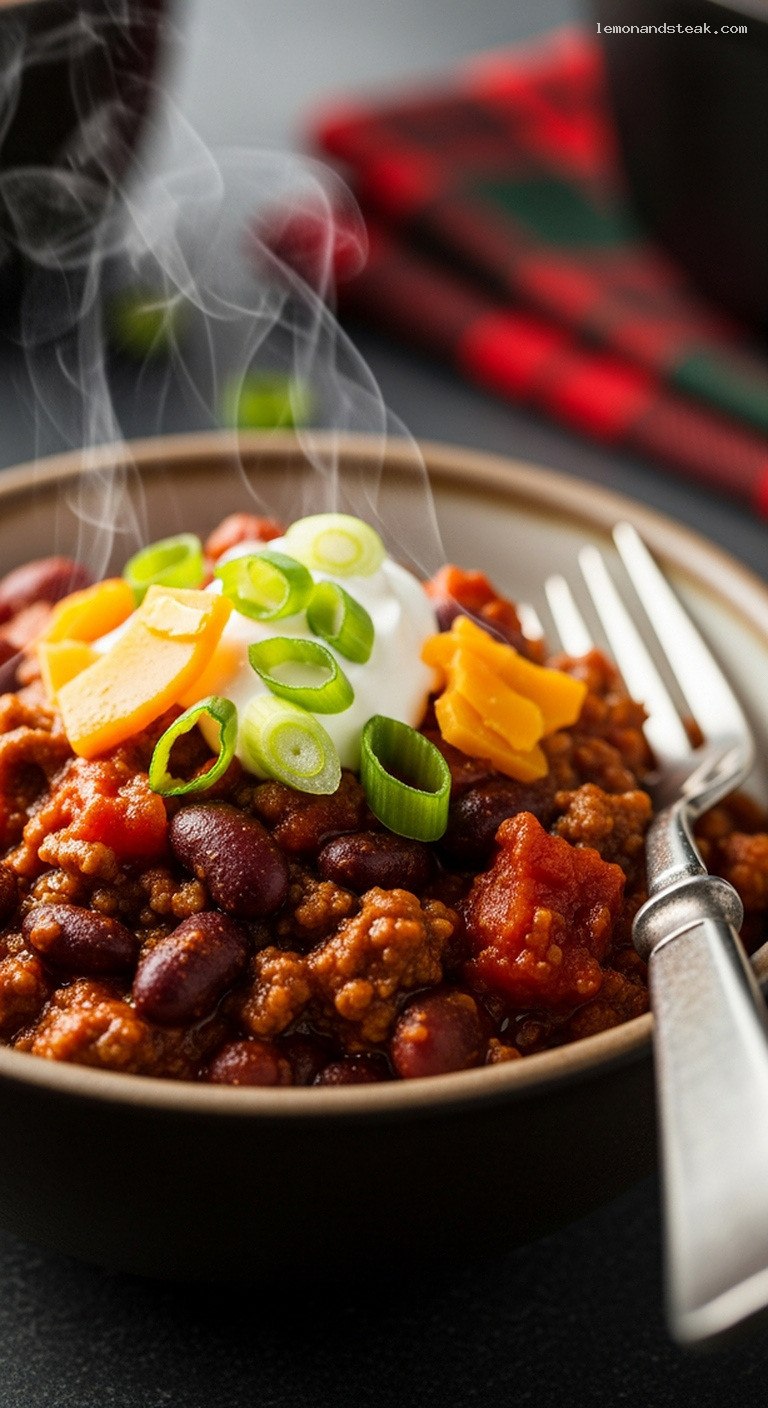
- Optional toppings: shredded cheddar, sour cream, green onions, cilantro
Do This
- 1. In a dry cast-iron Dutch oven over medium heat, toast chili powder, smoked paprika, cumin, oregano, coriander, chipotle, and cocoa for 30–60 seconds until fragrant; remove to a bowl.
- 2. Add oil, then cook onion, bell pepper, and jalapeño with a pinch of salt for 6–8 minutes until softened; stir in garlic for 1 minute.
- 3. Add ground beef, season with salt and pepper, and brown over medium-high heat 8–10 minutes, breaking it up and letting bits crisp.
- 4. Stir in tomato paste and the toasted spices; cook 2 minutes. Deglaze with beer (or broth), scraping up browned bits.
- 5. Add broth, tomatoes, tomato sauce, beans, brown sugar, and remaining salt. Bring to a boil, then reduce to low and simmer 30–45 minutes, partially covered, stirring occasionally.
- 6. Taste and adjust salt, smoke, and heat; simmer uncovered a bit longer if you like it thicker. Serve hot with your favorite chili toppings.
Why You’ll Love This Recipe
- Deep, smoky flavor from campfire-style toasted spices, fire-roasted tomatoes, and a touch of chipotle.
- All made in one cast-iron pan or Dutch oven for easy cooking and hearty, rustic presentation.
- Thick, beefy, and loaded with beans for a filling dinner that feeds a crowd.
- Perfect for stovetop or campfire, and it tastes even better the next day.
Grocery List
- Produce: 1 large yellow onion, 1 red bell pepper, 1 jalapeño (optional), 4 cloves garlic, green onions, fresh cilantro (for topping).
- Dairy: Shredded sharp cheddar cheese, sour cream (or plain Greek yogurt).
- Pantry: Vegetable or canola oil, 2 lb ground beef (80/20), tomato paste, chili powder, smoked paprika, ground cumin, dried oregano, ground coriander, chipotle chili powder or chipotle in adobo, unsweetened cocoa powder, kosher salt, black pepper, brown sugar, low-sodium beef broth, lager beer (or extra broth), 1 (28 oz) can fire-roasted diced tomatoes, 1 (15 oz) can tomato sauce, 1 (15 oz) can kidney beans, 1 (15 oz) can black beans, optional liquid smoke and crushed red pepper flakes.
Full Ingredients
For the Smoky Chili Base
- 2 tbsp vegetable or canola oil
- 1 large yellow onion, diced
- 1 red bell pepper, diced
- 1 jalapeño, seeded and minced (leave some seeds for extra heat, optional)
- 4 cloves garlic, minced
- 2 lb (900 g) ground beef, 80/20 for best flavor
- 3 tbsp tomato paste
- 1 cup low-sodium beef broth
- 1 cup lager beer (or substitute 1 more cup beef broth)
- 1 (28 oz) can fire-roasted diced tomatoes, with juices
- 1 (15 oz) can tomato sauce
- 1 tbsp packed brown sugar
- 2 tsp kosher salt, plus more to taste
- 1/2 tsp freshly ground black pepper
- Optional: 1/4 tsp liquid smoke, to taste, for extra smokiness
Campfire-Toasted Spice Mix
- 2 tbsp chili powder
- 2 tsp smoked paprika
- 2 tsp ground cumin
- 1 tsp dried oregano
- 1 tsp ground coriander
- 1 tsp chipotle chili powder or 1–2 tbsp finely minced chipotle peppers in adobo (added with wet ingredients instead of toasting)
- 1 tsp unsweetened cocoa powder
- Optional: 1/4–1/2 tsp crushed red pepper flakes for extra heat
Beans and Tomatoes
- 1 (15 oz) can kidney beans, drained and rinsed
- 1 (15 oz) can black beans, drained and rinsed
- 1 (28 oz) can fire-roasted diced tomatoes (already listed above, but key to smokiness)
- 1 (15 oz) can tomato sauce (already listed above)
Optional Toppings and Serving Ideas
- 1–2 cups shredded sharp cheddar or Monterey Jack cheese
- Sour cream or plain Greek yogurt
- 2–3 green onions, thinly sliced
- Fresh cilantro leaves, chopped
- Diced red onion
- Crushed tortilla chips or cornbread on the side
Step-by-Step Instructions
Step 1: Preheat the Cast Iron and Toast the Spices
Place a heavy cast-iron Dutch oven (5–6 quarts) or deep cast-iron skillet over medium heat on the stovetop or on a medium-hot section of your campfire grate. Let it heat for 2–3 minutes until warm.
In a small bowl, combine the chili powder, smoked paprika, ground cumin, dried oregano, ground coriander, cocoa powder, and crushed red pepper flakes (if using). If you are using chipotle chili powder, add it here; if using chipotle in adobo, set that aside to add later with the wet ingredients.
Pour the dry spice mixture into the hot, dry cast iron. Toast, stirring constantly with a wooden spoon or spatula, for 30–60 seconds, just until very fragrant and slightly darker. Do not walk away and do not let it burn. Immediately scrape the toasted spices back into the bowl and set aside. This quick toasting step blooms the oils in the spices and gives the chili its campfire depth.
Step 2: Sauté the Aromatics
Return the pot to medium heat and add the vegetable oil. When the oil shimmers, add the diced onion, red bell pepper, and minced jalapeño along with a big pinch of salt. Cook, stirring occasionally, for 6–8 minutes, until the vegetables are softened and the onions are turning translucent and lightly golden at the edges.
Add the minced garlic and cook for 1 minute more, stirring frequently, until fragrant. Keeping the garlic from browning helps avoid bitterness in your chili.
Step 3: Brown the Ground Beef
Increase the heat to medium-high. Push the vegetables to the sides of the pot to clear a space in the center and add the ground beef in a single layer. Sprinkle with 1 teaspoon of the kosher salt and the black pepper.
Let the beef cook undisturbed for 2–3 minutes to develop a good sear on the bottom. Then begin breaking it up with a wooden spoon or spatula, stirring it together with the vegetables. Continue cooking for 8–10 minutes, until the beef is no longer pink and you see some browned, slightly crisp bits. If there is an excessive amount of fat pooling in the pot, carefully spoon off a few tablespoons, but leave enough to keep everything flavorful and moist.
Step 4: Build the Flavor Base with Tomato Paste and Toasted Spices
Reduce the heat to medium. Stir in the tomato paste and cook, stirring constantly, for 1–2 minutes. The paste should darken slightly in color and start to stick to the bottom in places; this caramelization adds a rich, almost smoky sweetness.
Sprinkle in the toasted spice mixture and stir well to coat the beef and vegetables evenly. Cook for another 1 minute to let the spices bloom into the fat and tomato paste. If you are using chipotle in adobo instead of chipotle powder, add it now and stir to distribute.
Step 5: Deglaze and Add Liquids, Tomatoes, and Beans
Pour in the beer (or 1 cup additional beef broth). As it bubbles, use your spoon to scrape up all the browned bits stuck to the bottom of the pot; these are packed with flavor. Let the liquid simmer for 2–3 minutes to reduce slightly.
Add the beef broth, fire-roasted diced tomatoes with their juices, tomato sauce, kidney beans, black beans, brown sugar, remaining 1 teaspoon kosher salt, and any liquid smoke (if using). Stir thoroughly to combine, making sure nothing is stuck on the bottom.
Bring the chili up to a gentle boil over medium-high heat, then immediately reduce the heat to low so it settles into a steady, lazy simmer. If you are over a campfire, move the pot to a cooler part of the grill or raise it higher over the coals.
Step 6: Simmer Until Thick, Smoky, and Rich
Simmer the chili, partially covered with the lid slightly askew, for 30–45 minutes. Stir every 10 minutes or so, scraping the bottom and sides, until the chili is thickened and the flavors have melded. The beans should be tender but not mushy, and the liquid should coat the back of a spoon.
If you like your chili even thicker, remove the lid for the last 10–15 minutes and let some extra liquid evaporate. Taste and adjust seasoning: add more salt if it tastes flat, more smoked paprika or a tiny splash of liquid smoke for smokiness, and more chipotle or red pepper flakes if you want extra heat.
Step 7: Serve Hot with Your Favorite Toppings
Turn off the heat and let the chili sit for 5 minutes to settle and cool slightly; this also allows the flavors to round out. Ladle the smoky cast-iron chili into warm bowls.
Top with shredded sharp cheddar, a dollop of sour cream, sliced green onions, and chopped cilantro as desired. Serve with cornbread, crusty bread, or tortilla chips on the side. Enjoy immediately, or let it cool and refrigerate overnight for even deeper flavor.
Pro Tips
- Toast, do not burn: When toasting spices, keep them moving and pull them off the heat as soon as they smell nutty and fragrant. Burned spices will make the whole pot bitter.
- Let the beef really brown: Resist the urge to stir constantly. Giving the beef time to sear builds the deep, meaty flavor that makes this chili taste like it cooked all day.
- Control the heat level: Start with less jalapeño and chipotle if you are spice-sensitive. You can always add more heat at the end with extra chipotle, hot sauce, or crushed red pepper.
- Campfire cooking: If cooking over coals, aim for a medium heat (you can hold your hand 5 inches above the grate for 3–4 seconds). Rotate the pot occasionally for even cooking and keep a little extra broth on hand in case the chili reduces too quickly.
- Even better the next day: This chili develops even deeper smoky flavor after resting in the fridge overnight. It is an excellent make-ahead meal for busy weeks or trips.
Variations
- Smoky chipotle turkey chili: Swap the ground beef for ground turkey (preferably 93% lean). Add 1 extra tablespoon of oil when browning and be careful not to overcook the turkey so it stays moist.
- No-bean cowboy chili: For a bean-free version, omit the beans and add an extra 1 lb of ground beef or a 15 oz can of fire-roasted tomatoes. Simmer uncovered a bit longer to reach a thick, hearty consistency.
- Extra-vegetable chili: Add 1 diced zucchini and 1 cup corn kernels after the beef is browned. Sauté for 3–4 minutes before adding the liquids for more texture and sweetness.
Storage & Make-Ahead
Let the chili cool to room temperature, then transfer it to airtight containers. Refrigerate for up to 4 days. The flavors deepen with time, so leftovers are often even better than the first night. For longer storage, freeze in freezer-safe containers or heavy-duty freezer bags for up to 3 months. Thaw overnight in the refrigerator, then reheat gently on the stovetop over medium-low heat, stirring occasionally and adding a splash of water or broth if it is too thick. This recipe is ideal for making a day or two ahead for camping trips or gatherings; simply reheat in your cast-iron pot over the stove or campfire.
Nutrition (per serving)
Approximate values for 1 of 6 servings (without toppings): about 560 calories; 38 g protein; 30 g fat; 14 g saturated fat; 32 g carbohydrates; 9 g fiber; 9 g sugars; 1,050 mg sodium. Actual values will vary based on specific ingredients, toppings, and portion sizes.
Leave a Reply