Quick Recipe Version (TL;DR)
Quick Ingredients
- 4 cups (520 g) all-purpose flour, plus more for dusting
- 1 1/2 teaspoons baking soda
- 1 1/2 teaspoons fine salt
- 3 tablespoons (38 g) granulated sugar
- 3 tablespoons (42 g) cold unsalted butter, cut into small cubes
- 1 3/4 cups (420 ml) cold buttermilk, plus 1–2 tablespoons as needed
Do This
- 1) Heat oven to 425°F (220°C). Line a sheet pan with parchment (or use a cast-iron skillet).
- 2) Whisk flour, baking soda, salt, and sugar in a large bowl.
- 3) Cut in cold butter until crumbly (pea-size bits).
- 4) Stir in buttermilk just until a shaggy dough forms; add 1–2 tablespoons more buttermilk only if dry flour remains.
- 5) Turn onto a floured counter, gently bring together, and shape into a 7-inch round.
- 6) Place on pan, score a deep cross about 1/2 inch deep, and bake 35–40 minutes until deep golden and 200°F (93°C) inside.
- 7) Cool on a rack 10–15 minutes before slicing.
Why You’ll Love This Recipe
- No yeast, no waiting: It’s a true quick bread—mix, shape, bake.
- Rustic and reliable: A crackled crust with a dense yet tender crumb.
- Lightly sweet: Just enough sugar to round out the tangy buttermilk.
- Everyday ingredients: Simple pantry staples with big cozy payoff.
Grocery List
- Produce: None (optional: 1 tablespoon orange zest for a bright twist)
- Dairy: Buttermilk, unsalted butter
- Pantry: All-purpose flour, baking soda, fine salt, granulated sugar
Full Ingredients
Dry Ingredients
- 4 cups (520 g) all-purpose flour, plus more for dusting
- 1 1/2 teaspoons baking soda
- 1 1/2 teaspoons fine salt
- 3 tablespoons (38 g) granulated sugar
Fat
- 3 tablespoons (42 g) cold unsalted butter, cut into small cubes
Liquid
- 1 3/4 cups (420 ml) cold buttermilk, plus 1–2 tablespoons as needed

Step-by-Step Instructions
Step 1: Preheat and set up your pan
Place a rack in the center of the oven and preheat to 425°F (220°C). Line a baking sheet with parchment paper, or use an ungreased cast-iron skillet for extra-crisp edges. Keep your buttermilk cold until you’re ready to pour it in; cold liquid helps prevent overmixing and keeps the crumb tender.
Step 2: Whisk the dry ingredients thoroughly
In a large mixing bowl, whisk together the flour, baking soda, salt, and sugar until evenly combined. Take a moment here: even distribution is important because baking soda needs to be well mixed for a consistent rise and flavor (no bitter pockets).
Step 3: Cut in the cold butter
Add the cold butter cubes to the bowl. Using a pastry cutter, two knives, or your fingertips, work the butter into the flour until the mixture looks crumbly with some pea-size pieces remaining. Those little bits of butter melt in the oven and help the bread stay tender instead of tough.
Step 4: Add buttermilk and mix gently
Make a well in the center and pour in 1 3/4 cups (420 ml) cold buttermilk. Stir with a fork or wooden spoon just until the dough looks shaggy and most of the flour is moistened.
If you still see a few streaks of dry flour at the bottom, drizzle in 1–2 tablespoons more buttermilk, a little at a time. The dough should look rough and slightly sticky, but it should hold together when pressed.
Step 5: Shape into a rustic round (no kneading)
Turn the dough out onto a lightly floured counter. Dust your hands and gently bring the dough together. Avoid kneading; instead, fold and press just enough (about 10–15 seconds) to form a cohesive mound. Shape into a round about 7 inches wide and roughly 2 inches thick.
Step 6: Score the cross for the classic rise
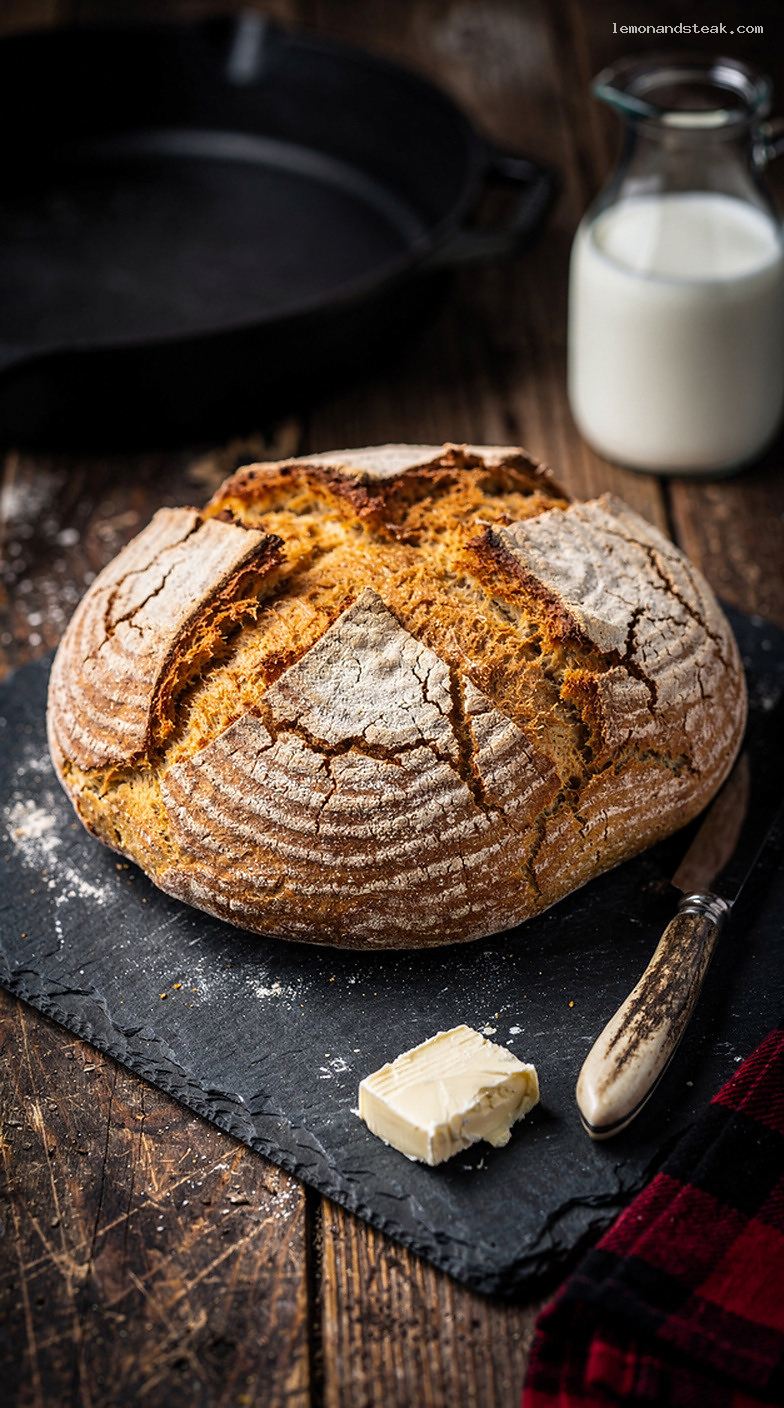
Transfer the round to your prepared pan. Using a sharp knife, score a deep cross on top, about 1/2 inch deep, cutting nearly to the edges. This helps the center bake through and gives the loaf its traditional rustic look and crackled crust.
Step 7: Bake until deeply golden and fully set
Bake at 425°F (220°C) for 35–40 minutes, until the top is a deep golden brown and the loaf sounds hollow when tapped on the bottom. For the most accurate doneness check, insert an instant-read thermometer into the center; it should read 200°F (93°C).
Step 8: Cool briefly, then slice and serve
Move the loaf to a wire rack and let it cool for 10–15 minutes. This short rest lets the crumb set so it slices cleanly. Serve warm with butter, jam, or alongside a hearty soup.
Pro Tips
- Measure flour accurately: If you can, weigh it. Too much flour is the #1 reason soda bread turns dry and heavy.
- Don’t overmix: Stir just until the dough comes together. Overworking develops gluten and makes the loaf tough.
- Use real buttermilk when possible: The acidity activates the baking soda for the best rise and flavor.
- Score deeply: A shallow cut can trap steam and leave the center underbaked.
- Let color be your guide: Pale soda bread often tastes underbaked. Aim for a confident, deep golden crust.
Variations
- Irish soda bread with currants: Add 1 cup (150 g) currants or raisins to the dry ingredients before the buttermilk.
- Caraway seed version: Add 1 tablespoon caraway seeds for a classic savory, deli-style aroma.
- Whole wheat blend: Swap in 1 cup (120 g) whole wheat flour for 1 cup of all-purpose flour; add 2 tablespoons extra buttermilk if the dough feels dry.
Storage & Make-Ahead
Irish soda bread is best the day it’s baked, especially while the crust is crackly. Store leftovers tightly wrapped at room temperature for up to 2 days. For longer storage, slice the cooled loaf, wrap well, and freeze for up to 2 months. Thaw slices at room temperature or warm them in a 300°F (150°C) oven for 8–10 minutes (or toast). If the loaf feels a bit dry on day two, a quick toast with butter brings it right back.
Nutrition (per serving)
Approximate, per slice (1/10 loaf): 190 calories; 4 g fat (2.5 g saturated); 36 g carbohydrates; 3 g sugar; 5 g protein; 1 g fiber; 380 mg sodium.
Leave a Reply