Quick Recipe Version (TL;DR)
Quick Ingredients
- 6 large eggs
- 2 tablespoons dashi (prepared and cooled)
- 2 teaspoons granulated sugar
- 2 teaspoons mirin
- 1 teaspoon soy sauce
- 1/8 teaspoon kosher salt
- 2 teaspoons neutral oil (plus more as needed), for the pan
- Optional for serving: 2 tablespoons grated daikon, 1 sliced scallion, soy sauce for dipping
Do This
- 1. Whisk eggs with dashi, sugar, mirin, soy sauce, and salt until combined (don’t over-aerate).
- 2. Heat a tamagoyaki pan on medium-low, lightly oil, then pour a thin layer of egg.
- 3. When mostly set, roll the egg up tightly to one side of the pan.
- 4. Oil the empty space, pour in more egg, lift the roll so egg flows underneath, then roll again.
- 5. Repeat for 3–5 layers until all egg is used, keeping heat medium-low to avoid browning too fast.
- 6. Shape the roll gently in the pan, then rest 5 minutes (wrapped in foil or a sushi mat if you have one).
- 7. Slice into 1/2-inch (1.25 cm) pieces and serve warm or room temperature.
Why You’ll Love This Recipe
- Soft, tender layers: The dashi makes the omelette custardy and moist, not dry.
- Sweet-savory balance: Just enough sugar and mirin to feel classic without being dessert-sweet.
- Bento-friendly: Tastes great at room temperature and slices neatly for packing.
- Beginner-friendly technique: Clear cues for when to roll, how thin to pour, and how to control heat.
Grocery List
- Produce: daikon radish (optional), scallion (optional)
- Dairy: large eggs
- Pantry: dashi (instant powder + water, or prepared dashi), granulated sugar, mirin, soy sauce, kosher salt, neutral oil (canola, rice bran, grapeseed, or vegetable)
Full Ingredients
Egg Mixture
- 6 large eggs
- 2 tablespoons dashi (prepared and cooled)
- 2 teaspoons granulated sugar
- 2 teaspoons mirin
- 1 teaspoon soy sauce
- 1/8 teaspoon kosher salt
For the Pan
- 2 teaspoons neutral oil (plus more as needed for re-oiling between layers)
Optional for Serving
- 2 tablespoons grated daikon (daikon oroshi)
- 1 scallion, thinly sliced
- 1–2 teaspoons soy sauce (for dipping or drizzling)
Step-by-Step Instructions
Step 1: Set up your pan and tools
Use a tamagoyaki pan (about 7 x 7 inches / 18 x 18 cm or similar). If you don’t have one, an 8-inch (20 cm) nonstick skillet works too; your roll will just be more rounded.
Have ready: a flexible spatula, a small bowl of oil, and a folded paper towel (or pastry brush) for quickly oiling the pan.
Step 2: Mix the seasoning into the eggs
Crack 6 large eggs into a bowl. Add 2 tablespoons dashi, 2 teaspoons sugar, 2 teaspoons mirin, 1 teaspoon soy sauce, and 1/8 teaspoon kosher salt.
Whisk gently until the whites and yolks are fully combined and the sugar dissolves. Try not to whip in lots of air; too many bubbles can make the finished slices look pitted. If you want extra-smooth tamagoyaki, pour the mixture through a fine-mesh strainer into a measuring cup with a spout.
Step 3: Heat the pan low and oil it lightly
Place the pan over medium-low heat for about 1 minute. If you use an infrared thermometer, aim for a surface temperature around 300°F (150°C).
Add about 1/2 teaspoon oil and wipe it around with the oiled paper towel so the pan is evenly coated but not pooling. A thin, even film helps the layers release and keeps the omelette tender.
Step 4: Cook the first thin layer and start the roll
Pour in enough egg mixture to make a thin layer, about 1/4 of the mixture (roughly 1/4 cup / 60 ml, but you don’t need to measure exactly). Tilt the pan so it spreads edge to edge.
Let it cook until the bottom is set and the top is mostly set but still a little glossy, about 45–75 seconds. If big bubbles appear, pop them with the tip of your spatula.
Starting from the far edge, use your spatula to gently lift and roll the egg toward you into a tight log. Move the roll to the far side of the pan (away from you), seam-side down.
Step 5: Add the next layer, bond it, and roll again
Lightly oil the empty part of the pan (add about 1/4 teaspoon oil if the pan looks dry, then wipe to a thin film). Pour in another thin layer of egg (another about 1/4 of the mixture).
Lift the existing roll slightly with your spatula so the fresh egg runs underneath it. This is what “glues” the layers together.
Cook until the new layer is mostly set on top, about 45–75 seconds, then roll the log back toward you, enclosing the new layer. Keep the roll snug and even.
Step 6: Repeat layers until all egg is used
Repeat the same process (oil lightly, pour a thin layer, let it mostly set, roll) until you’ve used all the egg mixture, typically 3–5 total layers.
Keep the heat at medium-low the whole time. If the egg browns too quickly, lower the heat and give the pan 20–30 seconds to cool slightly before the next pour. A few golden spots are fine and traditional; you’re aiming for tender layers, not deep browning.
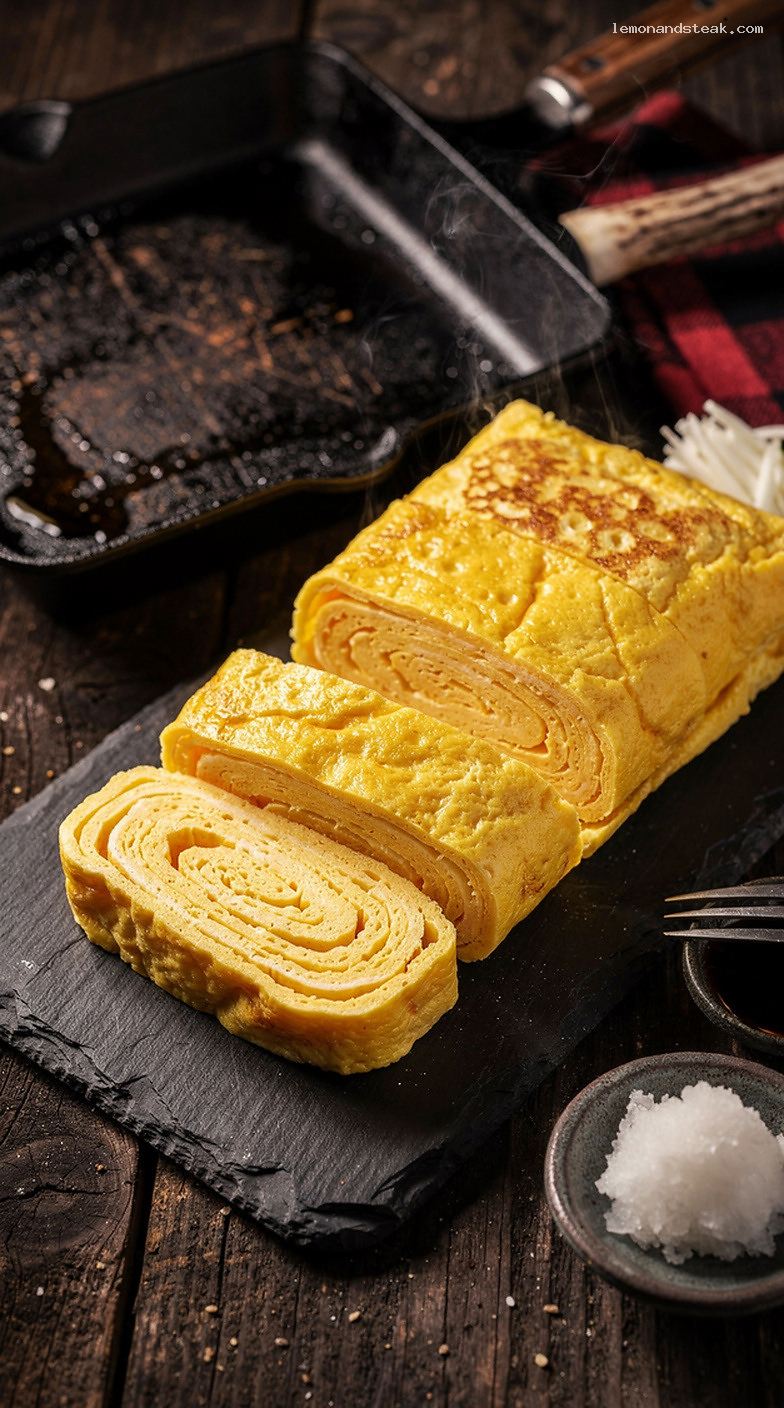
Step 7: Shape, rest, slice, and serve
When the final layer is rolled, gently press and square off the log in the pan with your spatula for about 15–30 seconds, turning it to firm up the sides. The center should feel springy, not liquid.
Transfer to a cutting board. For the neatest slices, wrap the roll in foil (or a bamboo sushi mat if you have one) and let it rest for 5 minutes to set the shape and finish carryover cooking.
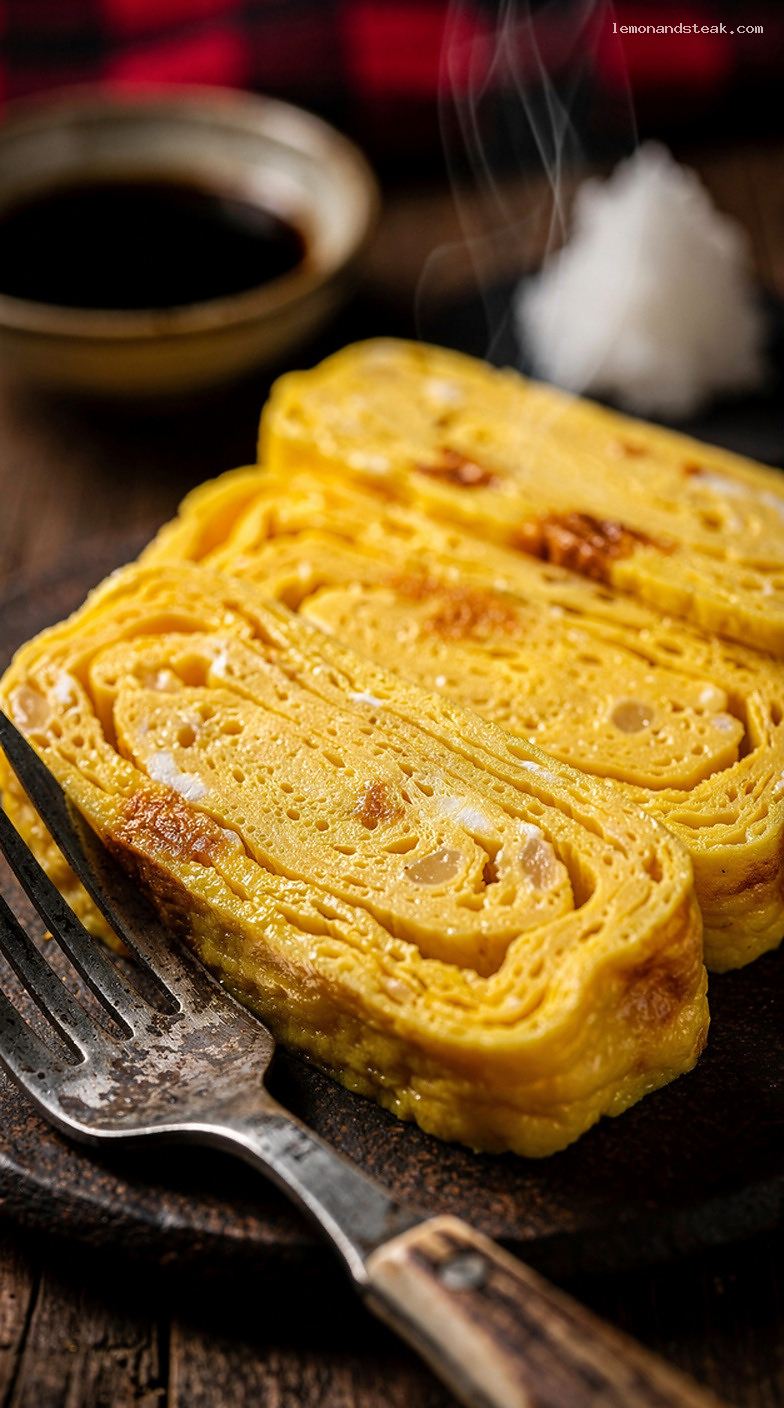
Slice into 1/2-inch (1.25 cm) pieces with a sharp knife (wipe the blade between cuts if needed). Serve warm or at room temperature, optionally with grated daikon, sliced scallion, and a little soy sauce on the side.
Pro Tips
- Think “thin crepes,” not “scrambled eggs”: Each pour should be a thin sheet so you get distinct layers.
- Mostly set is the sweet spot: Roll when the top is still faintly glossy; fully dry egg is more likely to crack and taste firmer.
- Oil lightly but consistently: A thin film prevents sticking without frying the egg. Re-oil between layers if the pan looks dry.
- Use a spouted cup: Pouring is much easier and cleaner from a measuring cup with a spout.
- Square it up while hot: A short rest wrapped in foil (or a mat) makes the roll tidy and sliceable.
Variations
- More savory (less sweet): Reduce sugar to 1 teaspoon and increase soy sauce to 1 1/2 teaspoons.
- Dashi swap: If you don’t have dashi, use 2 tablespoons water plus an extra tiny pinch of salt (the flavor will be simpler but still tasty).
- Add-ins (use a light hand): Sprinkle a thin line of 1 tablespoon minced scallion or 1 tablespoon shredded nori over a layer before rolling. Too much filling makes rolling harder.
Storage & Make-Ahead
Cool leftovers to room temperature, then wrap tightly and refrigerate for up to 3 days. Tamagoyaki is excellent cold or gently warmed. To reheat, microwave slices on a plate at 50% power for 20–40 seconds (avoid overheating, which can make eggs rubbery). For make-ahead bento: cook, cool, wrap, refrigerate, and slice in the morning for the cleanest edges.
Nutrition (per serving)
Approximate, per 1/3 recipe (about 4 slices): 200 calories; 13 g protein; 8 g carbohydrates; 13 g fat; 4 g saturated fat; 430 mg sodium; 1 g sugar.
Leave a Reply