Quick Recipe Version (TL;DR)
Quick Ingredients
- 4 large pita breads (about 8-inch), white or whole wheat
- 3 tbsp extra-virgin olive oil, divided
- 3/4 tsp fine sea salt, divided
- 1/2 tsp garlic powder
- 1 tsp smoked paprika, divided
- 1/4 tsp freshly ground black pepper
- 1 cup jarred roasted red peppers, well drained and patted dry
- 1/2 cup plain Greek yogurt
- 1 tbsp tahini (optional but recommended)
- 1 small garlic clove, minced
- 1 tbsp fresh lemon juice
- 1/4 tsp ground cumin
- Pinch cayenne or chipotle chili powder (optional, for heat)
- 2 tbsp chopped fresh parsley, plus extra for garnish
Do This
- 1) Preheat oven to 400°F (200°C). Line 1–2 baking sheets with parchment.
- 2) Cut pitas into 8 wedges each. Toss wedges with 2 tbsp olive oil, 1/2 tsp salt, garlic powder, 1/2 tsp smoked paprika, and pepper.
- 3) Spread pita wedges in a single layer on baking sheets. Bake 8–12 minutes, flipping halfway, until golden and crisp. Cool on the pan.
- 4) In a food processor, combine roasted red peppers, Greek yogurt, remaining 1 tbsp olive oil, tahini, garlic, lemon juice, 1/4 tsp salt, 1/2 tsp smoked paprika, cumin, and cayenne.
- 5) Blend until mostly smooth but still slightly textured. Taste and adjust salt, lemon, or heat as needed. Pulse in parsley.
- 6) Transfer dip to a bowl and swirl the top. Garnish with a drizzle of olive oil, pinch of smoked paprika, and extra parsley.
- 7) Serve the toasted pita chips warm or at room temperature alongside the smoky roasted red pepper dip.
Why You’ll Love This Recipe
- It turns simple pantry staples into a vibrant, restaurant-worthy snack in under 30 minutes.
- Warm, crisp pita chips pair perfectly with the cool, smoky, tangy roasted red pepper dip.
- Easy to scale up for parties and endlessly customizable with spices and toppings you already have.
- Great make-ahead option: bake the chips and blend the dip earlier in the day for stress-free entertaining.
Grocery List
- Produce: 1 small garlic clove, 1 lemon, 1 small bunch fresh parsley, (optional) extra veggies for dipping like cucumber, carrots, or cherry tomatoes
- Dairy: Plain Greek yogurt (2% or whole-milk for best flavor)
- Pantry: Pita breads, jarred roasted red peppers, extra-virgin olive oil, tahini (optional), fine sea salt or kosher salt, ground black pepper, garlic powder, smoked paprika, ground cumin, cayenne or chipotle chili powder (optional)
Full Ingredients
For the Toasted Pita Chips
- 4 large pita breads (about 8-inch each), white or whole wheat
- 2 tbsp extra-virgin olive oil
- 1/2 tsp fine sea salt or kosher salt
- 1/2 tsp garlic powder
- 1/2 tsp smoked paprika
- 1/4 tsp freshly ground black pepper
- Pinch cayenne pepper (optional, for a bit of heat)
For the Smoky Roasted Red Pepper Dip
- 1 cup jarred roasted red peppers, well drained and patted dry (from about an 8–12 oz jar)
- 1/2 cup plain Greek yogurt (2% or whole-milk for best creaminess)
- 1 tbsp tahini (optional but adds great body and nuttiness)
- 1 tbsp extra-virgin olive oil
- 1 small garlic clove, minced or grated
- 1 tbsp fresh lemon juice (about 1/2 lemon)
- 1/2 tsp smoked paprika
- 1/4 tsp ground cumin
- 1/4 tsp fine sea salt, plus more to taste
- 1/8 tsp cayenne or chipotle chili powder (optional, for a smoky kick)
- 2 tbsp finely chopped fresh parsley, plus extra for garnish
Optional Garnishes & Extras
- Extra drizzle of olive oil for the dip
- Pinch of smoked paprika on top of the dip
- Additional chopped fresh parsley
- Fresh veggie sticks or wedges (cucumber, carrots, bell peppers) to serve alongside the pita chips
Step-by-Step Instructions
Step 1: Preheat the Oven and Prep Your Pans
Set your oven to 400°F (200°C). Line one or two large baking sheets with parchment paper. This keeps the pita chips from sticking and makes cleanup easier, especially with the olive oil and spices.
While the oven heats, take out all your ingredients so everything is within reach. Drain your jarred roasted red peppers very well and gently pat them dry with paper towels. Removing excess liquid now will help you get a thicker, creamier dip later.
Step 2: Cut and Season the Pita
Stack the pita breads and cut them into wedges. The easiest way is to cut each pita into quarters, then cut each quarter in half to make 8 triangles per pita. You will have 32 bite-sized wedges in total.
Place the pita wedges in a large mixing bowl. Drizzle with 2 tbsp olive oil. Sprinkle on the 1/2 tsp salt, 1/2 tsp garlic powder, 1/2 tsp smoked paprika, 1/4 tsp black pepper, and an optional pinch of cayenne. Toss with your hands or a large spoon until every piece is lightly coated with oil and spices. Take a moment to separate any stuck-together pieces so they crisp evenly.
Step 3: Toast the Pita Chips
Arrange the seasoned pita wedges in a single layer on the prepared baking sheet(s). Try not to overcrowd the pan; a bit of space between pieces helps them crisp instead of steam.
Bake for 8–12 minutes, flipping the wedges halfway through. They are ready when the edges are deep golden brown and the chips feel crisp and dry to the touch. Keep a close eye on them toward the end; they can go from perfectly toasty to overdone quickly.
Remove from the oven and let the chips cool completely on the baking sheet. They will continue to firm up a little as they cool, giving you a beautiful shatter-crisp bite.
Step 4: Build the Smoky Roasted Red Pepper Base
In the bowl of a food processor (or a high-speed blender), combine the drained roasted red peppers, 1/2 cup Greek yogurt, 1 tbsp tahini (if using), 1 tbsp olive oil, minced garlic, and 1 tbsp lemon juice.
Add the 1/2 tsp smoked paprika, 1/4 tsp ground cumin, 1/4 tsp salt, and 1/8 tsp cayenne or chipotle chili powder if you like a little heat. These spices are what give the dip its deep, smoky flavor and warm color.
Step 5: Blend, Taste, and Adjust
Blend the mixture until mostly smooth, about 20–30 seconds. You can go completely smooth for a silky dip, or stop a bit earlier to keep a little texture from the peppers. Scrape down the sides of the bowl and blend again if needed.
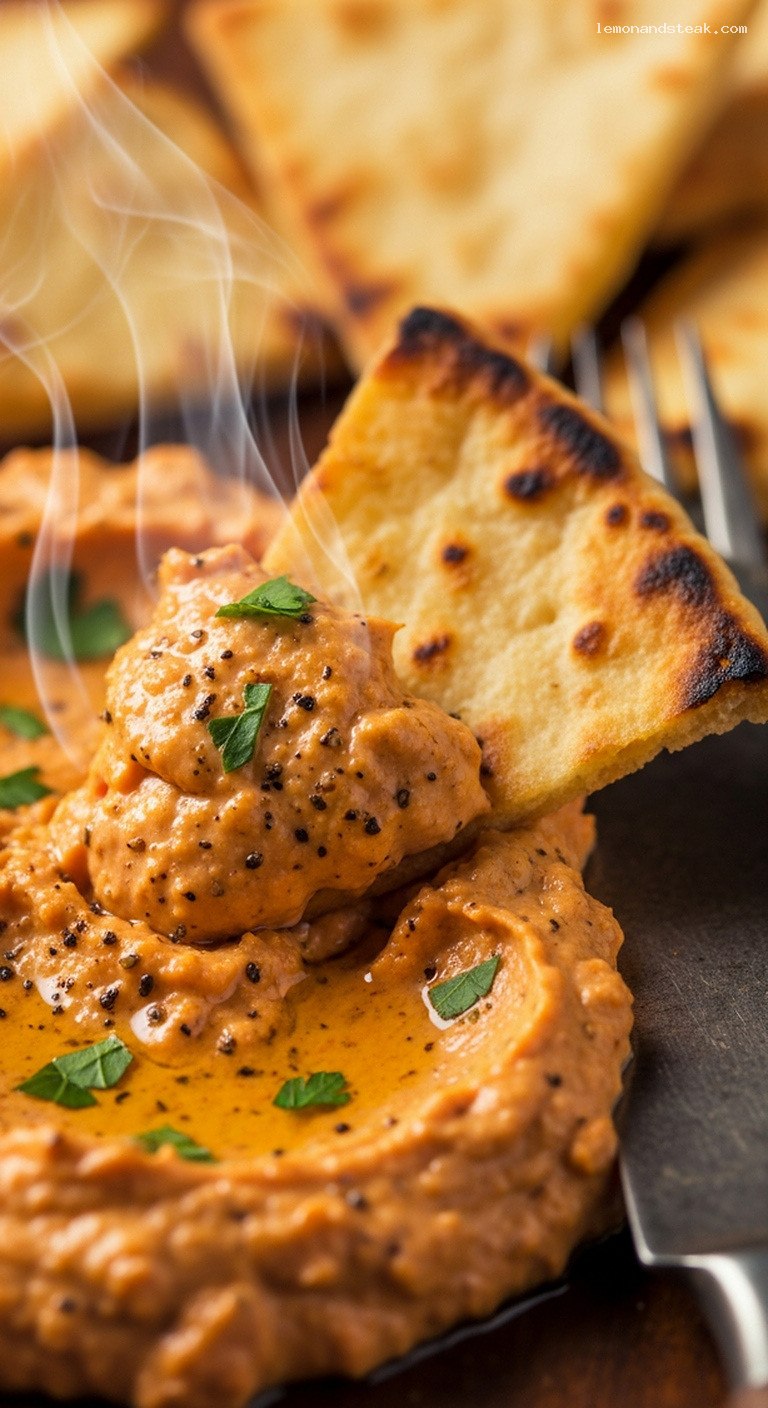
Taste the dip. Add more salt for savoriness, a bit more lemon juice for brightness, or extra smoked paprika or cayenne for a stronger smoky-spicy edge. When you are happy with the flavor, add the 2 tbsp chopped parsley and pulse a few times just to distribute it without completely pureeing the herbs.
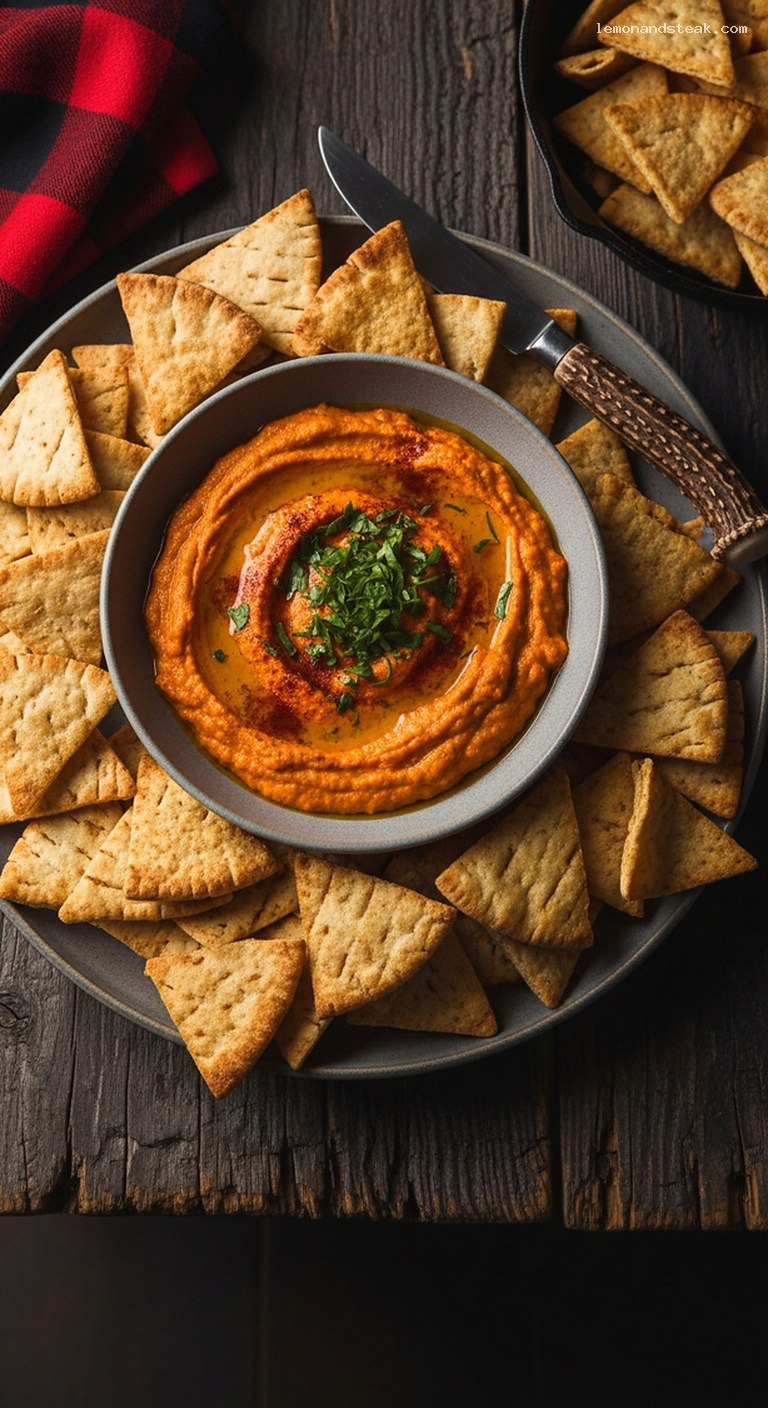
Step 6: Present the Dip Beautifully
Transfer the dip to a shallow serving bowl. Use the back of a spoon to create gentle swirls on the surface. Drizzle a thin ribbon of olive oil over the top, then sprinkle with a pinch of smoked paprika and a little extra chopped parsley for a pop of color.
This simple presentation makes the dip look rustic yet intentional, perfect for setting in the center of a platter.
Step 7: Build the Pita Chip Platter and Serve
Arrange the cooled pita chips around the bowl of dip on a large wooden board, platter, or baking sheet lined with parchment for a casual, rustic feel. If you are adding fresh veggies or extras, tuck them into the empty spaces around the dip and chips for color and variety.
Serve the platter right away while the pita chips are still slightly warm or at room temperature. Encourage guests (or yourself) to scoop a generous amount of dip with each chip so you get the full smoky, tangy flavor in every bite.
Pro Tips
- Dry the peppers well: Excess liquid from the jarred roasted red peppers will thin the dip. Pat them dry with paper towels before blending for a thicker, creamier texture.
- Watch the pita closely: Different ovens brown at different speeds. Start checking at 8 minutes to avoid over-browning the chips.
- Season in layers: Taste the dip before and after adding parsley. Adjust salt, lemon, and spice at the end so the flavors are balanced and bright.
- Cool chips before storing: If you plan to store pita chips, let them cool completely so steam does not make them soft inside a container.
- Double for a crowd: This recipe easily doubles. Use two oven racks and rotate the pans halfway through baking for even crisping.
Variations
- Extra smoky version: Add 1–2 tsp of adobo sauce from a can of chipotles in adobo to the dip, or lightly char one fresh red bell pepper under the broiler and use it in place of some of the jarred peppers.
- Cheesy twist: Blend in 1/4 cup finely grated Parmesan or crumbled feta to the dip for a saltier, richer flavor. You may need to add a splash of water or extra lemon juice to loosen it slightly.
- Herb-packed: Swap parsley for cilantro or basil, or use a mix of soft herbs for a fresh, green edge that pairs nicely with the smoky peppers.
Storage & Make-Ahead
The toasted pita chips can be stored in an airtight container at room temperature for up to 5 days. Make sure they are completely cool before sealing the container, or trapped steam can soften them.
The smoky roasted red pepper dip will keep in an airtight container in the refrigerator for up to 3 days. Stir before serving, as a little separation is normal. For the best flavor, let the dip sit at room temperature for about 15–20 minutes before serving so it is not ice-cold.
You can easily make everything ahead the morning of a gathering: bake and cool the pita chips, blend the dip, then assemble the platter just before serving.
Nutrition (per serving)
Approximate values for 1 of 6 appetizer servings (about a handful of pita chips and a generous scoop of dip): 220–250 calories, 9–11 g fat, 31–34 g carbohydrates, 3–4 g fiber, 7–9 g protein, 470–550 mg sodium. Values will vary based on brands used, whether you include tahini, and how heavily you season and garnish.
Leave a Reply