Quick Recipe Version (TL;DR)
Quick Ingredients
- 1 large crisp apple (about 200 g)
- 1 tsp lemon juice (to prevent browning, optional)
- 4 tbsp creamy peanut butter
- 1/4 cup crunchy granola
- 1 tsp honey or maple syrup (optional)
- 1 tbsp mini chocolate chips or raisins (optional)
- Pinch ground cinnamon (optional)
Do This
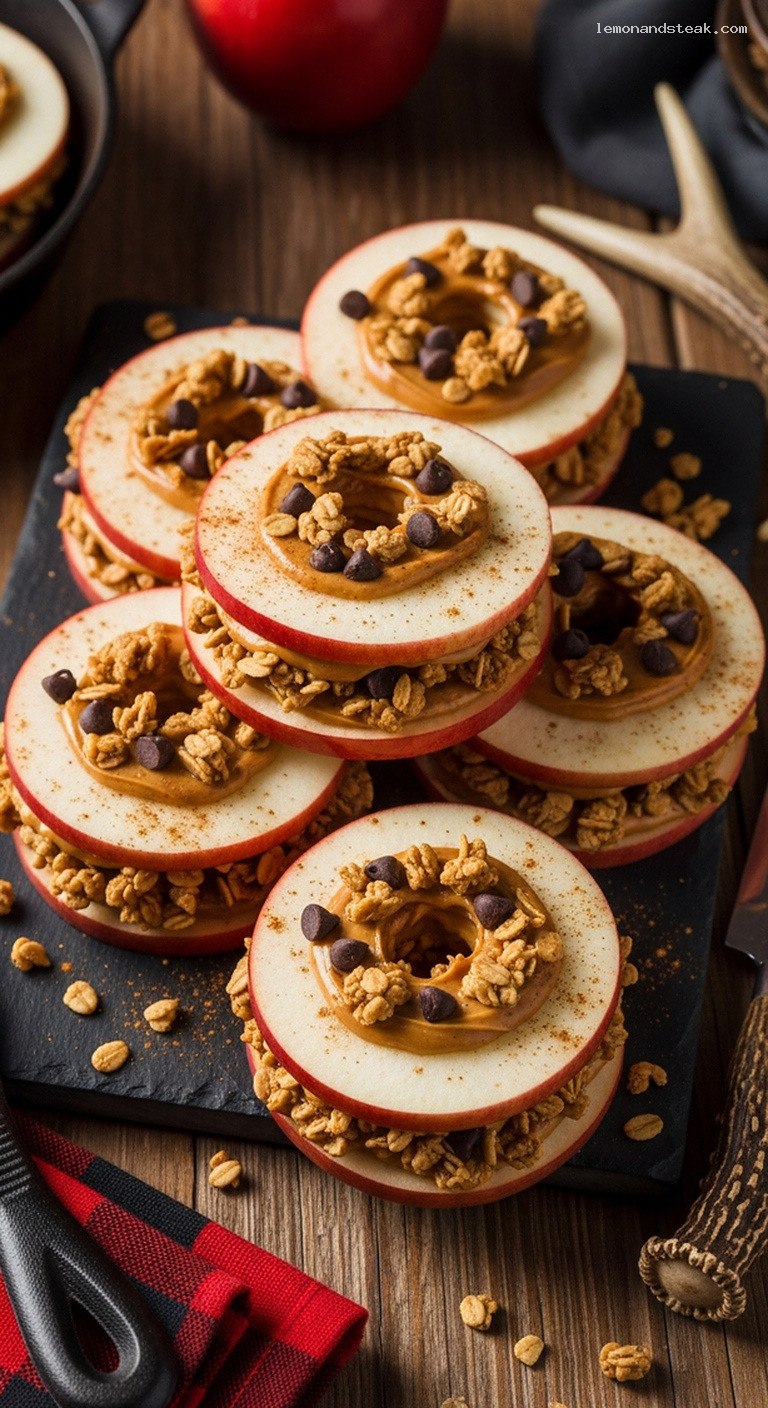
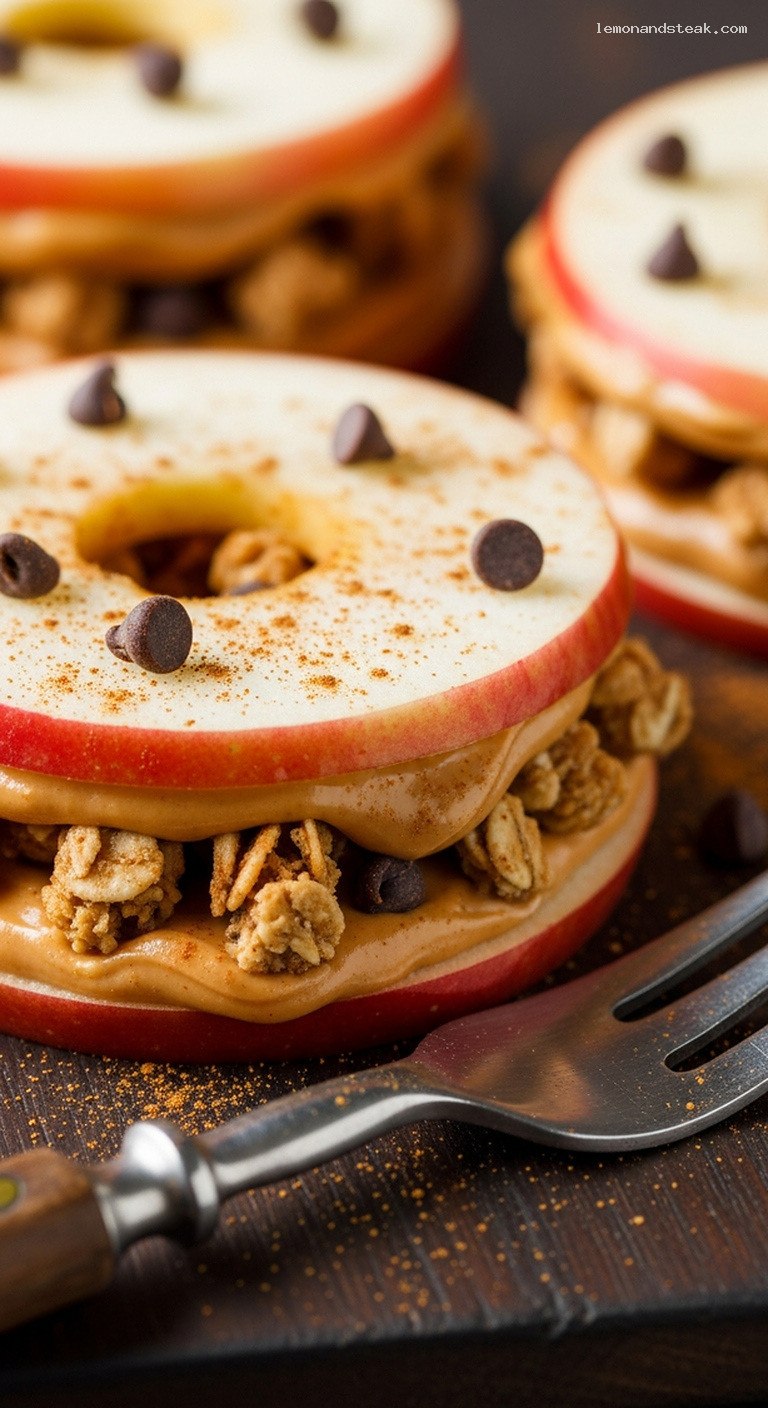
- 1. Wash and dry the apple, then core it and slice into 8 round slices about 0.6 cm thick.
- 2. Toss slices lightly with lemon juice to slow browning, then pat dry with a paper towel.
- 3. Lay 4 slices flat and spread each with about 1 tbsp peanut butter (or enough to coat the surface).
- 4. Sprinkle granola evenly over the peanut butter, then add chocolate chips or raisins and a pinch of cinnamon if using.
- 5. Drizzle a tiny bit of honey over the filling if you like extra sweetness.
- 6. Top each with a second apple slice to form sandwiches and press gently so the filling sticks.
- 7. Serve right away, or chill for up to 2–4 hours, covered, for a grab-and-go snack.
Why You’ll Love This Recipe
- Fast, no-cook snack that goes from cutting board to plate in about 10 minutes.
- Great balance of crisp apple, creamy peanut butter, and crunchy granola for serious texture.
- Easy to customize for kids, athletes, or anyone needing a quick energy bite.
- Gluten-free and easily adaptable for nut-free or vegan diets.
Grocery List
- Produce: 1 large crisp apple (such as Honeycrisp, Fuji, or Gala), 1 small lemon (optional)
- Dairy: None required
- Pantry: Peanut butter, granola, honey or maple syrup (optional), mini chocolate chips or raisins (optional), ground cinnamon (optional), fine salt (optional)
Full Ingredients
For the Apple “Sandwiches”
- 1 large crisp apple (about 200 g), such as Honeycrisp, Fuji, or Gala
- 1 tsp lemon juice (to slow browning, optional but recommended)
For the Peanut Butter & Granola Filling
- 4 tbsp creamy peanut butter (or other nut/seed butter)
- 1/4 cup crunchy granola (any flavor you enjoy)
- 1 tsp honey or maple syrup (optional, for extra sweetness)
- 1 tbsp mini chocolate chips or raisins (optional, for a treat-like version)
- 1/8 tsp ground cinnamon (a small pinch, optional)
- Small pinch fine sea salt (optional, enhances flavor if your peanut butter is unsalted)
Step-by-Step Instructions
Step 1: Prep your tools and ingredients
Gather a cutting board, a sharp knife or apple corer, a small bowl, a spoon or small offset spatula, and a plate or storage container.
Wash and dry the apple thoroughly; any moisture on the outside can make it slippery while slicing.
If using lemon juice, squeeze about 1 tsp into a small bowl and set aside.
Step 2: Core and slice the apple
If you have an apple corer, stand the apple upright and carefully remove the core straight down through the center.
If you do not have a corer, slice the apple vertically just to one side of the core, then continue cutting off “slabs” around the core.
Next, cut your apple into round slices about 0.6 cm thick (roughly 1/4 inch).
Aim for at least 8 slices so you can build 4 sandwiches; if you get extra slices, you can make more or serve them on the side.
Step 3: Keep the slices crisp and bright
To prevent browning, gently toss or brush both sides of the apple slices with the lemon juice.
Do not soak them; a light coating is plenty.
Lay the slices out on a clean kitchen towel or paper towels and pat them dry.
Drying this way helps the peanut butter grip the fruit instead of sliding off.
Step 4: Mix and taste your filling
In a small bowl, stir together the peanut butter, honey or maple syrup (if using), cinnamon, and a tiny pinch of salt if your peanut butter is unsalted.
Taste a dab and adjust to your liking: add a drop more honey for sweetness or a bit more cinnamon for warmth.
You want the mixture to be spreadable but not runny; if it seems too thick, loosen it with a few drops of water or lemon juice and stir again.
Step 5: Build the base layer
Lay half of the apple slices flat on the cutting board or plate; choose the largest and flattest slices for the base.
Using a spoon or small offset spatula, spread about 1 tbsp of the peanut butter mixture onto each base slice, leaving a small border at the edge.
The peanut butter should be thick enough to hold granola in place, but not so heavy that it squeezes out when you press the sandwich together.
Step 6: Add the crunch and extras
Sprinkle a generous pinch of granola over the peanut butter on each slice, using the full 1/4 cup across all bases.
If you like, lightly press the granola into the peanut butter so it sticks.
Scatter a few mini chocolate chips or raisins over each one for pops of sweetness and texture.
If you enjoy warm spice, dust a tiny pinch of cinnamon over the top for a cozy flavor boost.
Step 7: Top, press, and serve
Place a second apple slice on top of each prepared base to create sandwiches.
Gently press down so the peanut butter spreads to the edges and locks in the granola, but not so hard that everything squishes out.
If you want a more polished look, you can trim any large granola pieces that prevent the sandwich from sitting level.
Serve immediately for maximum crunch, or refrigerate, covered tightly, for up to 2–4 hours for a chilled grab-and-go snack.
Pro Tips
- Choose the right apple: Crisp, sweet-tart varieties like Honeycrisp, Fuji, or Pink Lady hold their shape and give the best crunch.
- Slice evenly: Try to keep slices the same thickness so your sandwiches stack evenly and do not topple over.
- Dry before spreading: Patting the apple slices dry after the lemon juice step helps the peanut butter adhere instead of sliding.
- Use crunchy granola: A chunky, toasted granola adds extra crunch and contrast to the creamy peanut butter.
- Pack for on-the-go: For lunchboxes, wrap each sandwich tightly in parchment or plastic wrap so they stay together and the apple does not dry out.
Variations
- Nut-free version: Swap peanut butter for sunflower seed butter or soy nut butter, and choose a nut-free granola for a school-safe snack.
- Fall spice twist: Use maple syrup instead of honey, double the cinnamon, and add a tiny pinch of ground nutmeg or allspice to the peanut butter.
- Protein boost: Stir 1–2 tsp of chia seeds or ground flaxseed into the peanut butter mixture, or use a high-protein granola.
Storage & Make-Ahead
These apple sandwiches are best eaten fresh, when the apples are at their crispiest and the granola is still crunchy.
For short-term storage, you can assemble them up to 2–4 hours in advance.
Brush the apple slices lightly with lemon juice, pat dry, assemble as directed, then place the sandwiches in a single layer in an airtight container.
Press a piece of parchment or wax paper gently over the top to limit air exposure and keep them from shifting.
Refrigerate until ready to eat.
If you want to prep further ahead, you can slice the apples and store them, tossed in lemon juice, in an airtight container for up to 24 hours, then assemble with peanut butter and granola just before serving for the best texture.
Nutrition (per serving)
Approximate values per serving (4 apple slice sandwiches), using 1 large apple, 4 tbsp peanut butter, 1/4 cup granola, 1 tsp honey, and 1 tbsp mini chocolate chips:
about 340 calories; 22 g fat; 30 g carbohydrates; 6 g fiber; 20 g total sugars (including natural fruit sugars); 10 g protein; 120 mg sodium.
Values will vary based on the specific peanut butter, granola, and add-ins you use.
Leave a Reply